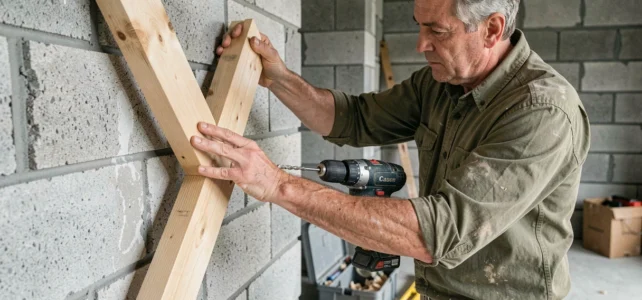
Fixing a rafter to a concrete block wall seems simple, until the drill bit falls into the void of a hollow cavity. The standard concrete block is not a solid block: its internal cavities radically change the way to anchor a load-bearing piece of wood. Knowing where to drill, what type of anchor to use, and in which area of the wall makes all the difference between a solid fixation and a pull-out under load.
Hollow, cracked, or coated concrete block: diagnose the wall before drilling
Before pulling out the drill, take the time to observe the wall. Tap the surface with the handle of a hammer: a hollow sound indicates a cavity, a dull sound signals a solid area or a reinforced concrete chain. This step avoids driving an anchor into empty space.
A concrete block covered with a coating presents an additional problem. The thickness of the plaster masks the joints and cracks. You need to lightly scrape the coating at the intended location to check the actual condition of the support. A coating that sounds hollow may indicate detachment, in which case the fixation will not hold.
A wall that has already been drilled multiple times, typical of a garage or a renovated shed, requires even more caution. Each old hole weakens the wall of the concrete block. If your wall looks like Swiss cheese, systematically offset your new drillings by at least five centimeters from the old ones.
Understanding how to fix a rafter to a concrete block first requires knowing the exact nature of the support, because the same anchor does not react the same way in a hollow block and in a solid concrete chain.
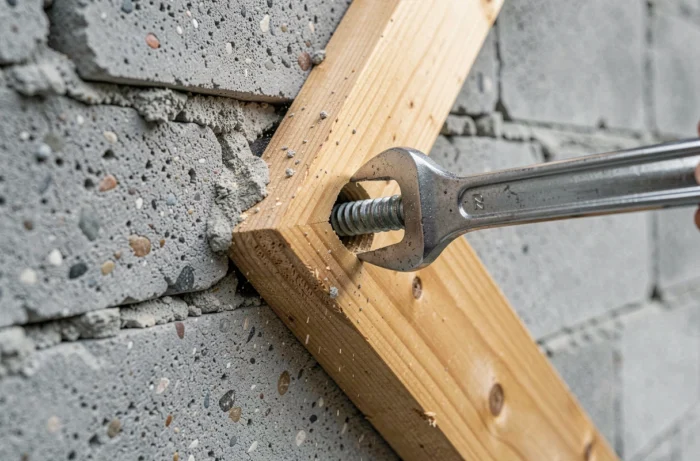
Fixing a rafter to a hollow concrete block: mechanical anchor or chemical bonding
You may have noticed that the plastic anchors supplied with commercial brackets do not hold long in a hollow concrete block? The problem comes from their mode of expansion: they push against the thin walls of the cavity, which eventually crumble under the load.
The expansion anchor for hollow walls
For a hollow concrete block, the metal Molly type expansion anchor remains a reliable solution if the load remains moderate. It deploys behind the wall of the block and distributes the effort over a larger surface. Be careful: you need to match the diameter of the anchor to the actual thickness of the wall of the concrete block.
Chemical bonding for heavy loads
When the rafter needs to support a significant load (roofing, sunshade, exterior insulation framework), chemical bonding offers the highest pull-out resistance in a hollow material. A resin is injected into the cavity through a sieve, then a threaded rod is inserted. The resin hardens and creates a volumetric anchor that no longer depends on the strength of the walls of the block.
Chemical bonding is more expensive than mechanical anchors. Its value is fully justified outdoors, where wind and humidity increase the risk of gradual pull-out.
Aim for the reinforced concrete chain rather than the standard concrete block
Experienced DIYers know: you do not fix a load-bearing piece in the hollow part of a standard concrete block if you can avoid it. The real reliable anchor point is the horizontal reinforced concrete chain, cast in U-shaped blocks, present at the top and sometimes in the middle of the wall.
By drilling into the chain, you are working in solid reinforced concrete. A simple hammer anchor or a concrete expansion anchor is sufficient then, without resorting to chemical bonding. The gain in strength is considerable.
Why does this choice change everything? Because a rafter fixed in the chain distributes the load over a structural element of the wall, not over a simple filling block. It’s the difference between an anchor that lasts for years and a fixation that fails at the first gust of wind.
- Locate the position of the horizontal chain: it is generally at the top of the wall, sometimes at mid-height on newer constructions
- Use a basic metal detector to confirm the presence of reinforcements in the drilling area
- If the chain is inaccessible (rafter placed too low or too high), resort to chemical bonding in the hollow concrete block
Outdoor fixation on concrete block: avoid water infiltration
Fixing a rafter outdoors adds a constraint that many forget: each drilling creates a potential passage for rainwater. On an exposed wall, water runs down the rafter and seeps through the fixation hole. Over time, moisture weakens the anchor, causes the wood to swell, and can lead to cracks in the concrete block due to freezing.
A polyurethane sealant applied between the rafter and the wall limits this risk. Apply a bead of sealant on the face of the rafter before pressing it against the wall, then tighten. The crushed sealant forms a continuous joint that prevents water from migrating towards the fixations.
For threaded rods in chemical bonding, the resin itself ensures good sealing of the hole. However, with mechanical anchors, the residual play around the screw allows water to pass through. A drop of sealant or silicone around each screw head solves the problem.
Distribution of fixations and tightening: common mistakes
A rafter fixed by only two points at the ends works in bending between the supports. Under load, it deforms and the two fixations bear all the effort.
- Space the fixation points evenly, planning at least one anchor every 40 to 60 centimeters depending on the load
- Use metal brackets rather than drilling directly through the rafter, especially on thin sections that may crack
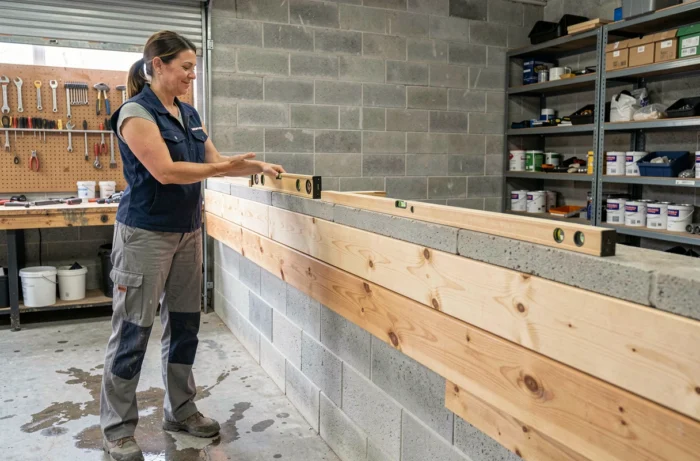
- Check the level and alignment before tightening permanently: a twisted rafter creates abnormal stresses on each fixation
- Tighten gradually, without forcing, to avoid crushing the friable masonry around the anchor
On an old wall or a medium-quality concrete block, excessive tightening causes the anchor to turn in its housing. If the anchor turns in the hole, it needs to be removed, switched to a larger diameter, or filled with mortar and re-drilled after complete drying.
The strength of a rafter on a concrete block depends less on the rafter itself than on the quality of the initial diagnosis and the choice of anchoring. Always identify the exact nature of the support before drilling, adapt the type of anchor to the area (hollow or solid), and never neglect sealing outdoors: these three reflexes avoid the vast majority of corrections.